Appearance
How to set up Password AutoFill on macOS
This guide describes how to activate Password AutoFill on your Mac and quickly enter passwords using KeePassium.
Initial setup
In order to use KeePassium AutoFill, you need to activate it in the system and in Safari.
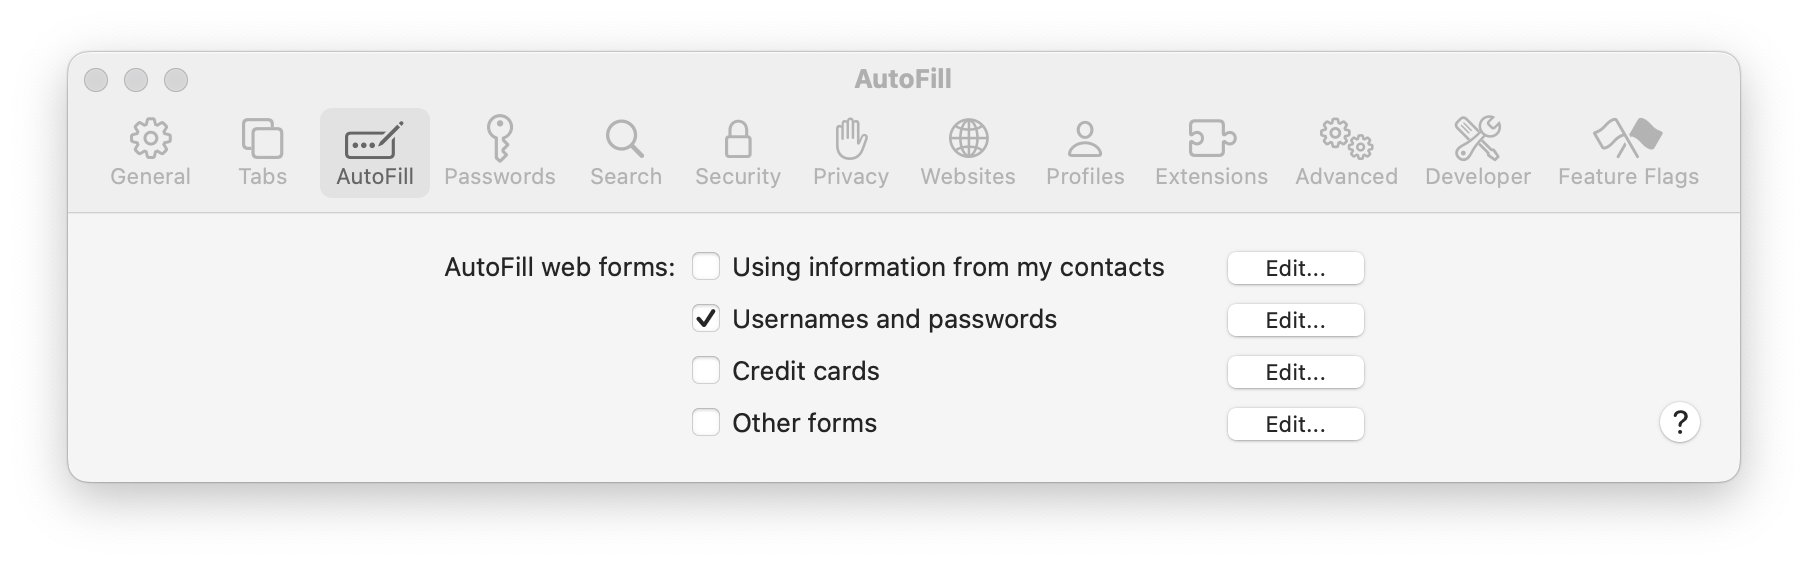
- Activate it in Safari
- Open Safari preferences
- In the top bar, click AutoFill
- Check the User names and passwords option
- Activate it in the system
- Open System Preferences
- Click General → AutoFill & Passwords
- Select KeePassium
For macOS 14
- Activate it in the system
- Open System Preferences
- Click Security & Privacy → scroll to the end → Extensions → Password AutoFill
- Select KeePassium AutoFill
How to use AutoFill
With AutoFill, you can quickly fill out passwords in webpages and compatible apps. Whenever you select a login field, you will see a "key" button inside.
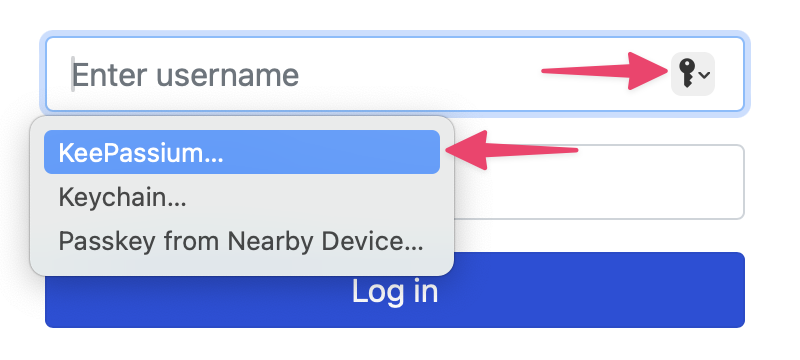
This button opens KeePassium's AutoFill module, which will show entries related to the calling app or webpage. Click the required entry and its username and password will be automatically entered in the login form.
Limitations
There are two ways to access AutoFill in macOS:
- Dedicated popup in login forms (Safari only)
- Context menu in any text field (any app)
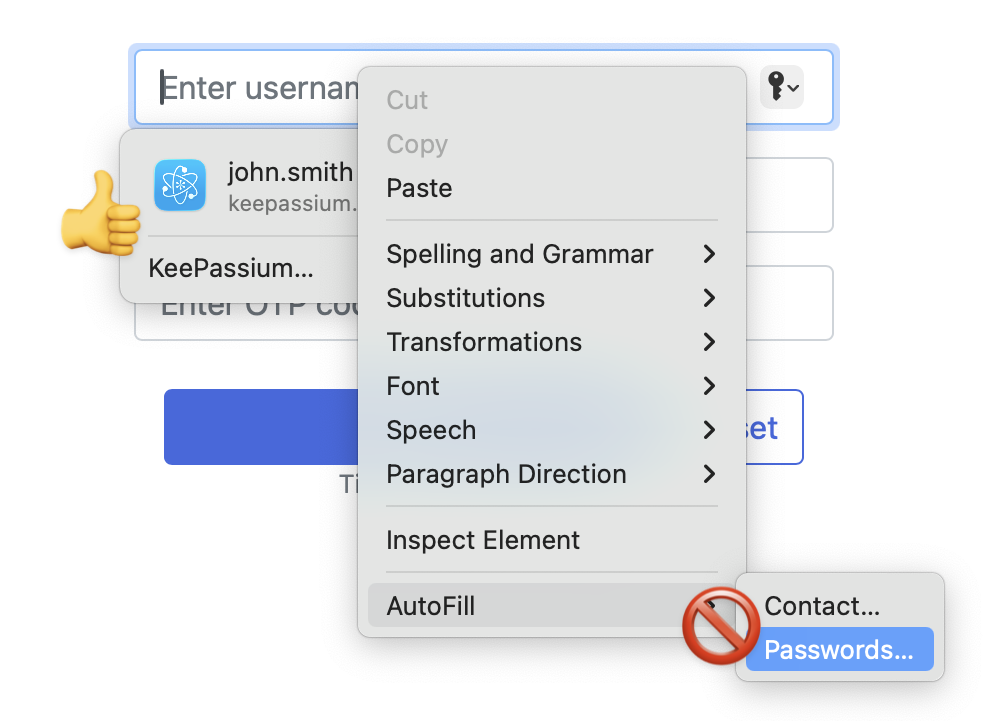
Unfortunately, AutoFill context menu always opens Apple Passwords. Even if you correctly configured KeePassium AutoFill. Even if you disabled Apple Passwords altogether. We cannot fix this, since the menu is hardwired by Apple; the only solution is to send feedback to Apple.