Appearance
How to use YubiKey with KeePassium
This article describes how to set up and use a YubiKey-protected database in KeePassium.
Add YubiKey protection to database
Once your YubiKey is configured, you can add it as a component of your database master key (along with a password and key file, or instead of them).
- Open the database with the current master key (password and/or key file)
- Tap the
 button and select Change Master Key in the menu.
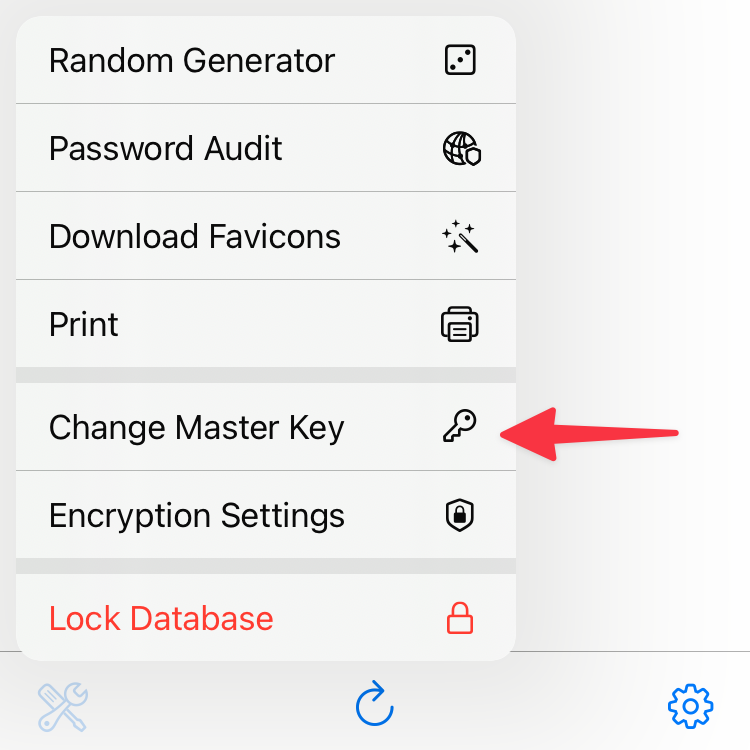
- Tap the Hardware key field and select YubiKey Slot 2 for the appropriate connection type.

- Tap Done to save changes.
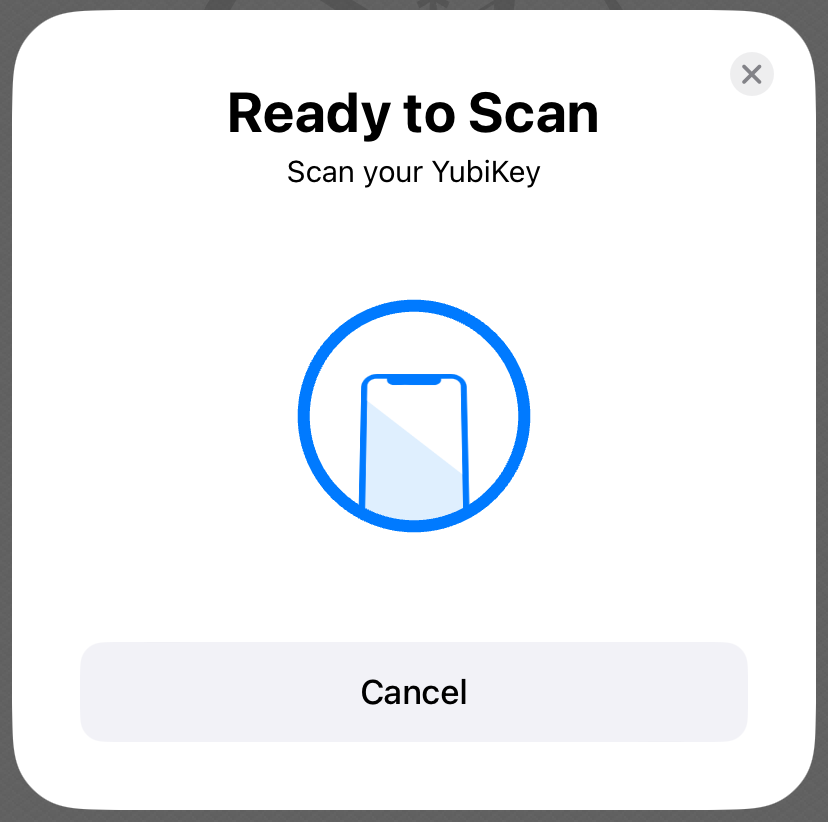
- The app will ask you to insert or scan your YubiKey (that is, touch it with the top side of your phone).
That's it! Now the database can be decrypted only with your YubiKey.
How to remove YubiKey protection from database
Sometimes you may need to remove YubiKey protection from your database. This is useful if you need to unlock database in apps that do not support YubiKey, or if you don't plan to use YubiKey any longer.
To remove YubiKey protection from your database, change your master key as described above, but select No Hardware Key instead of a YubiKey slot.
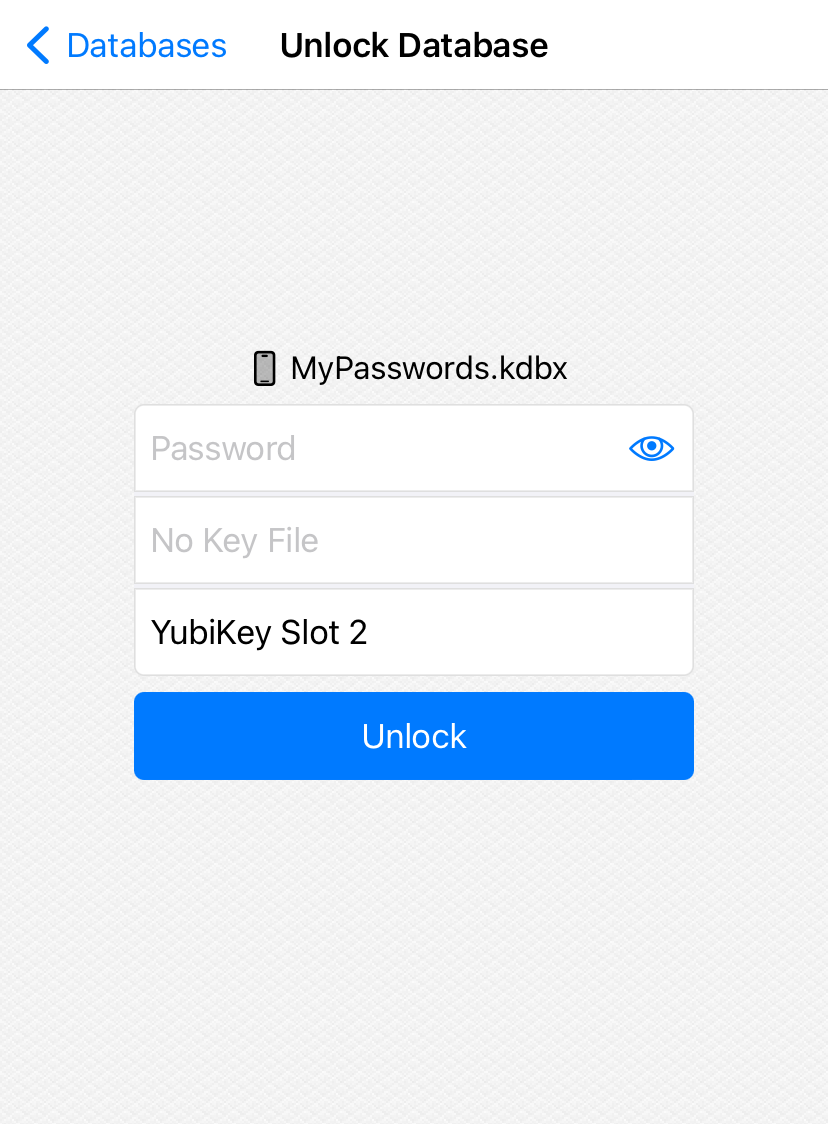
How to unlock a YubiKey-protected database
To unlock a YubiKey-protected database, tap the hardware key button and select YubiKey Slot 2. If necessary, enter your password and/or choose the key file.
Once prompted, insert or scan your YubiKey (touch it with the top side of your phone). If all the master key components are correct, the database will open up.
YubiKey in AutoFill
YubiKey support in AutoFill may require additional steps: How to use YubiKey in AutoFill