Appearance
YubiKey setup guide
This guide explains how to prepare your YubiKey for use in KeePassium and KeePassXC in challenge-response mode.
- On your computer, install the YubiKey Manager and launch it
- Insert your YubiKey, if you have not done that yet.
- If you see an "Unknown error occurred" on macOS, go to system preferences → Security & Privacy → Input Monitoring, and allow input monitoring for YubiKey Manager.
- Click Applications → OTP

- Choose the slot to configure. The first slot is reserved in some keys, so select Configuration Slot 2.

- Select Challenge-response credential type and click Next.

- Set your HMAC-SHA1 challenge-response parameters:
- Secret key — press Generate to randomize this field. Make sure to copy and store the generated secret somewhere safe. If you ever lose your YubiKey, you will need that secret to access your database and to program the replacement YubiKey.
- Require touch — this prevents rogue apps from talking to your YubiKey without your permission. When KeePassium requests your YubiKey, you will need to touch the "Y" button on the NFC key (or touch the sides of the YubiKey 5Ci key).
- Press Finish to write configuration to the YubiKey.
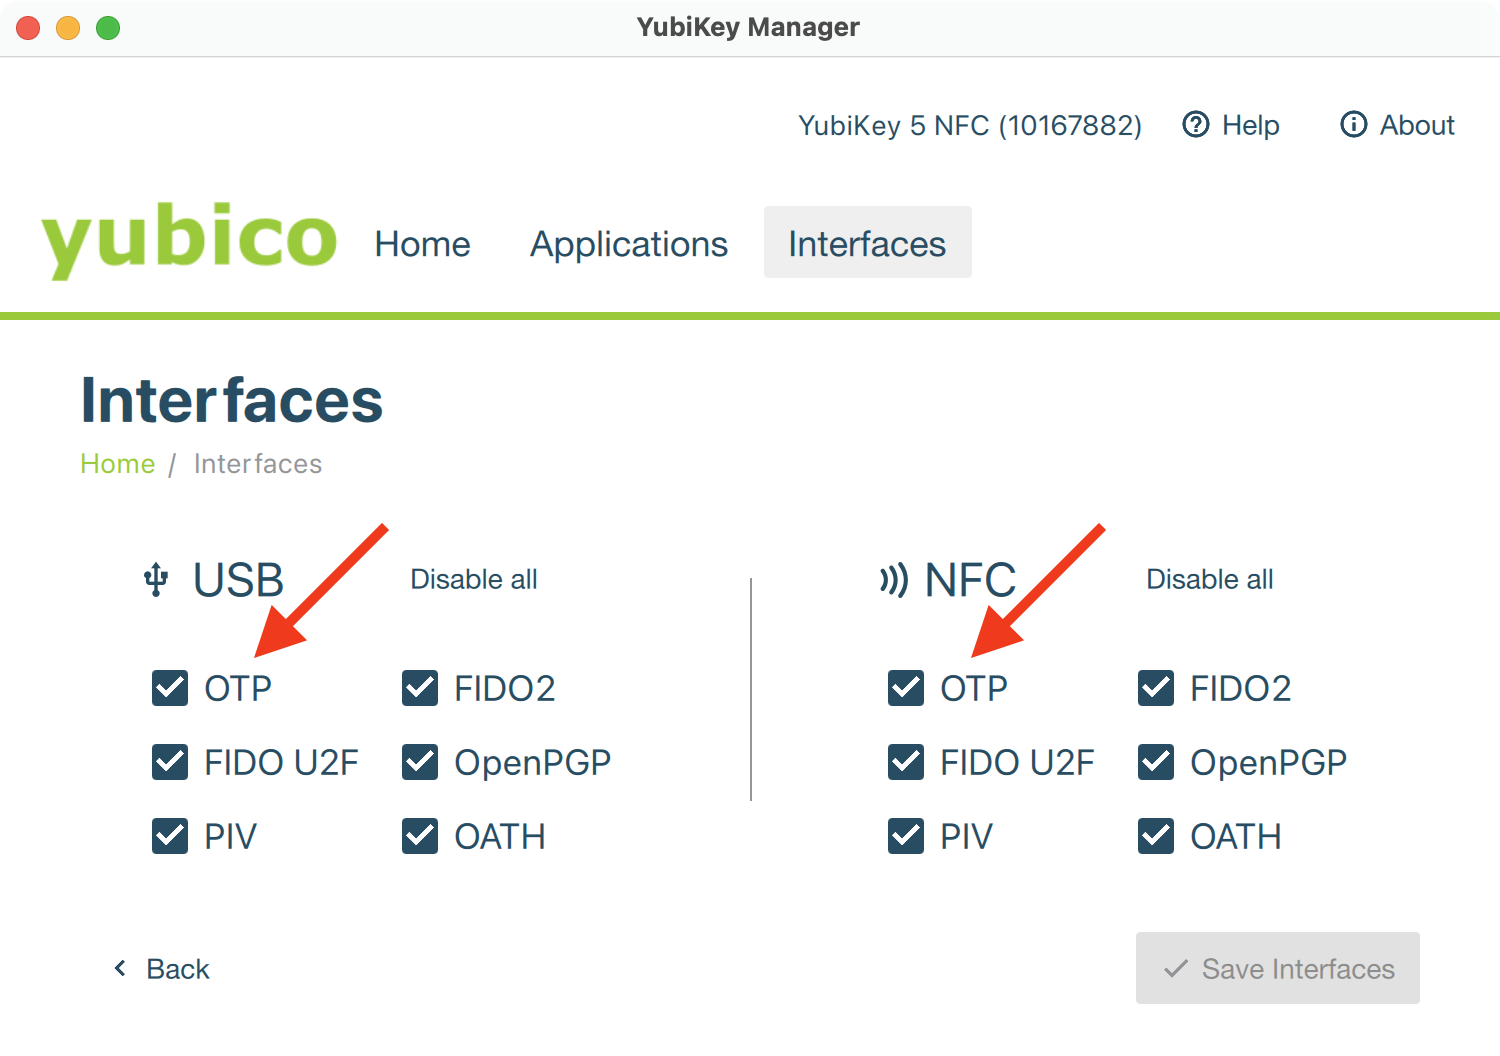
- Finally, make sure that apps can talk to your YubiKey. Click Interfaces and make sure that OTP is checked for both USB and NFC interfaces.
YubiKey backup methods
To avoid getting locked out from your data, there are two tactics:
- Configure multiple YubiKeys with the same secret key. All these keys will return exactly the same response for the same challenge, so for KeePassium they will look like the same key.
- Alternatively, store the secret key in a safe place. This way, you can later configure a new YubiKey to open your database.
WARNING
Once the YubiKey is configured, there is no way to read the secret key. So you won't be able to clone a YubiKey without its original secret key.